The image is the most important part of your website, conveying emotion and illustrating the theme you are sharing. Another important part of your website is speed, and speed is directly related to the size of the images on your website.
I have prepared a small guide – how to reduce (optimise) the images for the website so that the image quality is not affected. I use the same system on a daily basis.
Nowadays, pictures are very large – our mobile phones are set to take pictures larger than 4MB, for example 4031×2268 pixels. However, you can’t put such images on your website! NO – remember, this is very important! Otherwise, no website visitor will expect to download them and you will simply lose customers! According to a Hubsport article, 64% of mobile visitors expect a page to load faster than 4 seconds! If the page doesn’t load in that time they simply leave. There is no way you can get a page to open in 4 seconds if your page has 4MB of images.
Here’s how you can reduce the number of images uploaded to your website.
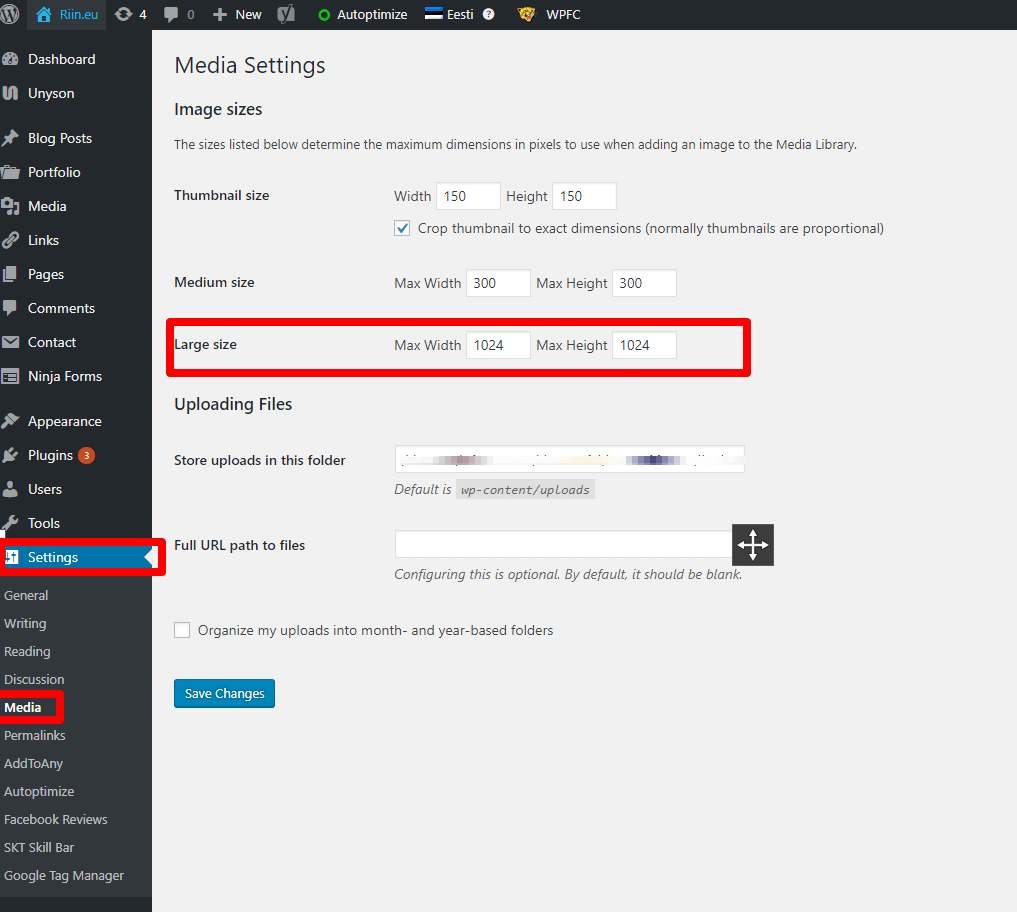
- Find out the maximum size your website will accept. You can check this, for example, from the WordPress admin interface – settings – media

How big a picture can I upload to the website
- On my riin.eu page then the largest images can be 1024x1024px. So, if you upload an image with a size of 1500x750px, for example, it will take up space unnecessarily. You should reduce the larger 1500px side of the image to 1024px.
- If the image size is reduced, the images need to be optimised for the web. There is a wonderful program for this https://tinypng.com/
. You upload the images you want to their site and they will do the necessary operations, which will result in the images being optimised. Watch the video below.
Remember, never upload an unoptimised image! It will just make your website slow!


